- Updated:

EasyPost shipping provider
Important
This plugin is currently deprecated and, starting from version 4.60.
Configuration
After installing the plugin of the EasyPost shipping provider you need to configure the integration. But first, ensure that the plugin is enabled (Configuration → Shipping → Shipping providers). To do so, click Edit and select the Is active checkbox. Also, for more accurate work of the plugin, it's recommended to disable all other shipping providers if they are not used.
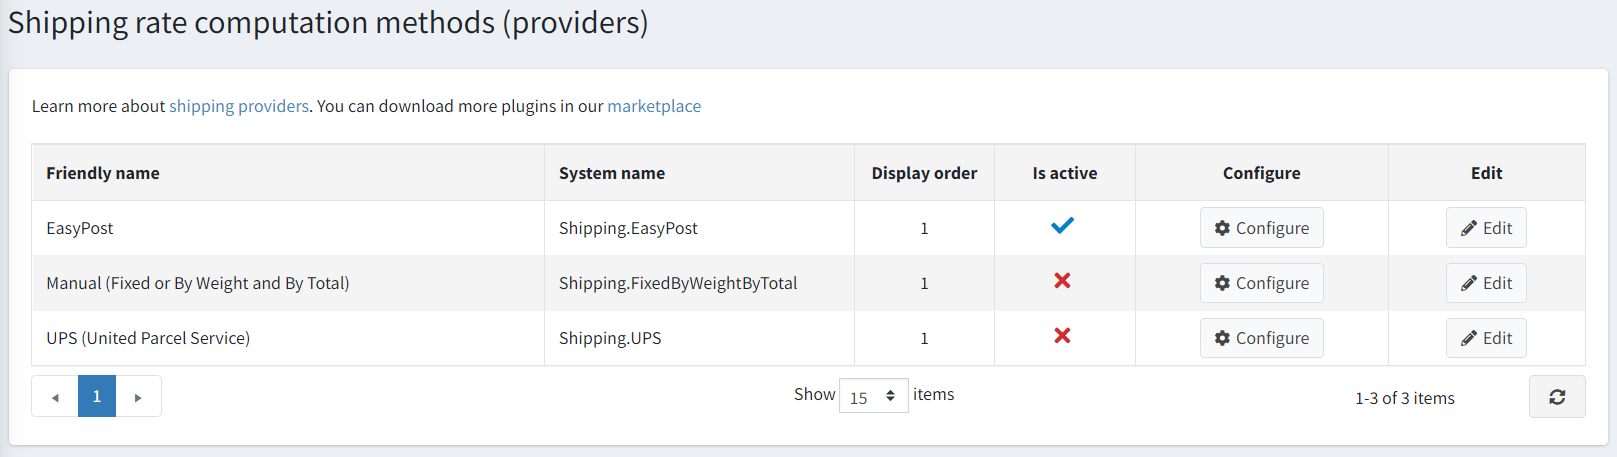
To configure the EasyPost shipping provider's plugin, click Configure beside the EasyPost option in the list.
Follow the instructions at the top of the Configure page to create an account. Enter your carrier-specific credentials on the Carrier Account Dashboard. Then configure the plugin. Each field's function will be annotated when "?" is hovered on.
Configure your EasyPost credentials:
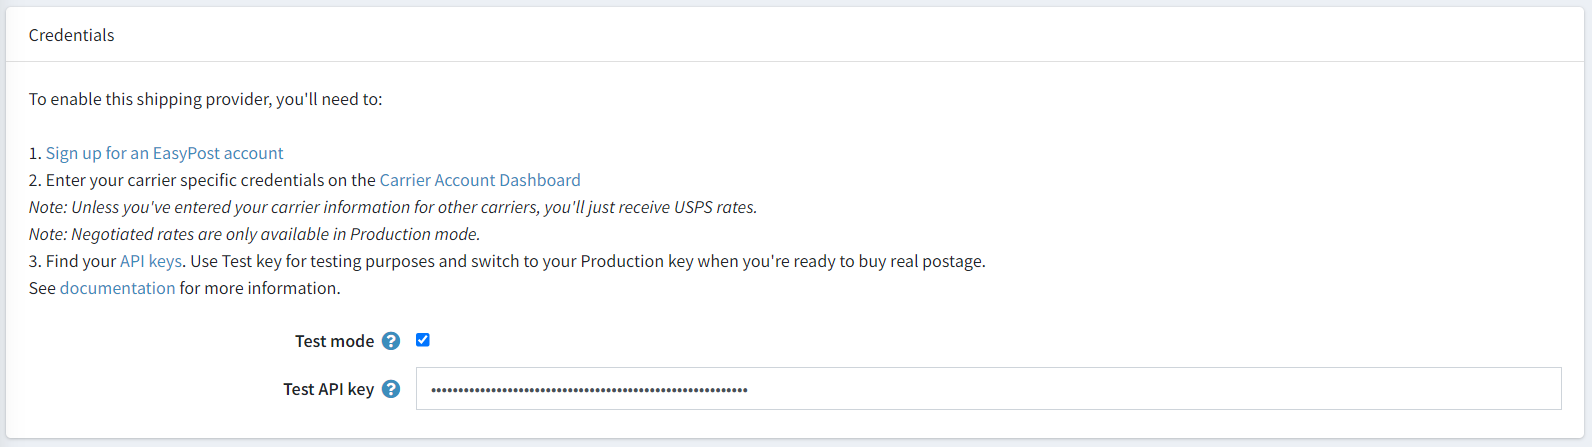
- Test mode is enabled to use it for testing purposes.
- API key: (Test or Production) is required for the plugin to work. You can manage your API Keys from your EasyPost account.
Select carriers:
Note
These settings are only available in production mode.

- Use all available carriers is enabled to use all available carriers for your account.
- Carrier accounts allows selecting specific carriers.
Configure address verification settings:
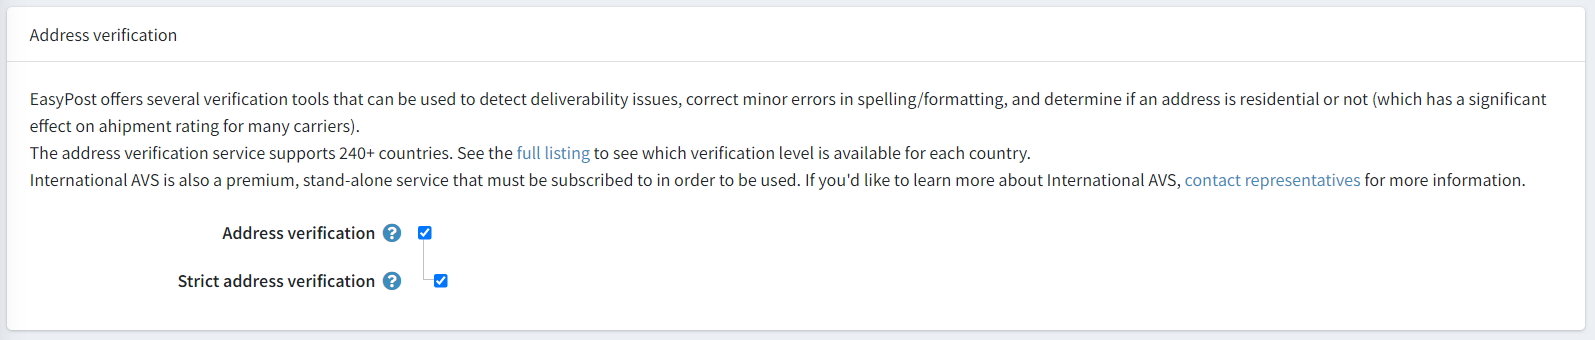
- Address verification is enabled to activate the address verification feature. It automatically makes minor corrections to spelling/format if applicable.
- Strict address verification is enabled to activate the strict address verification. In this case, any mistakes in a typed address cause the whole request to fail, and the customer needs to correct and specify the address again.
Save the plugin's configuration.
Also, make sure that weight measure (ounce), dimension measure (inches) and currency (USD) are created, and the ratio is set correctly in your store. These are required for the plugin to work correctly. You can learn more about measures here and about currencies here.
Additional product details
You can specify additional product info to be used in EasyPost requests.
Navigate to product details and find this section.
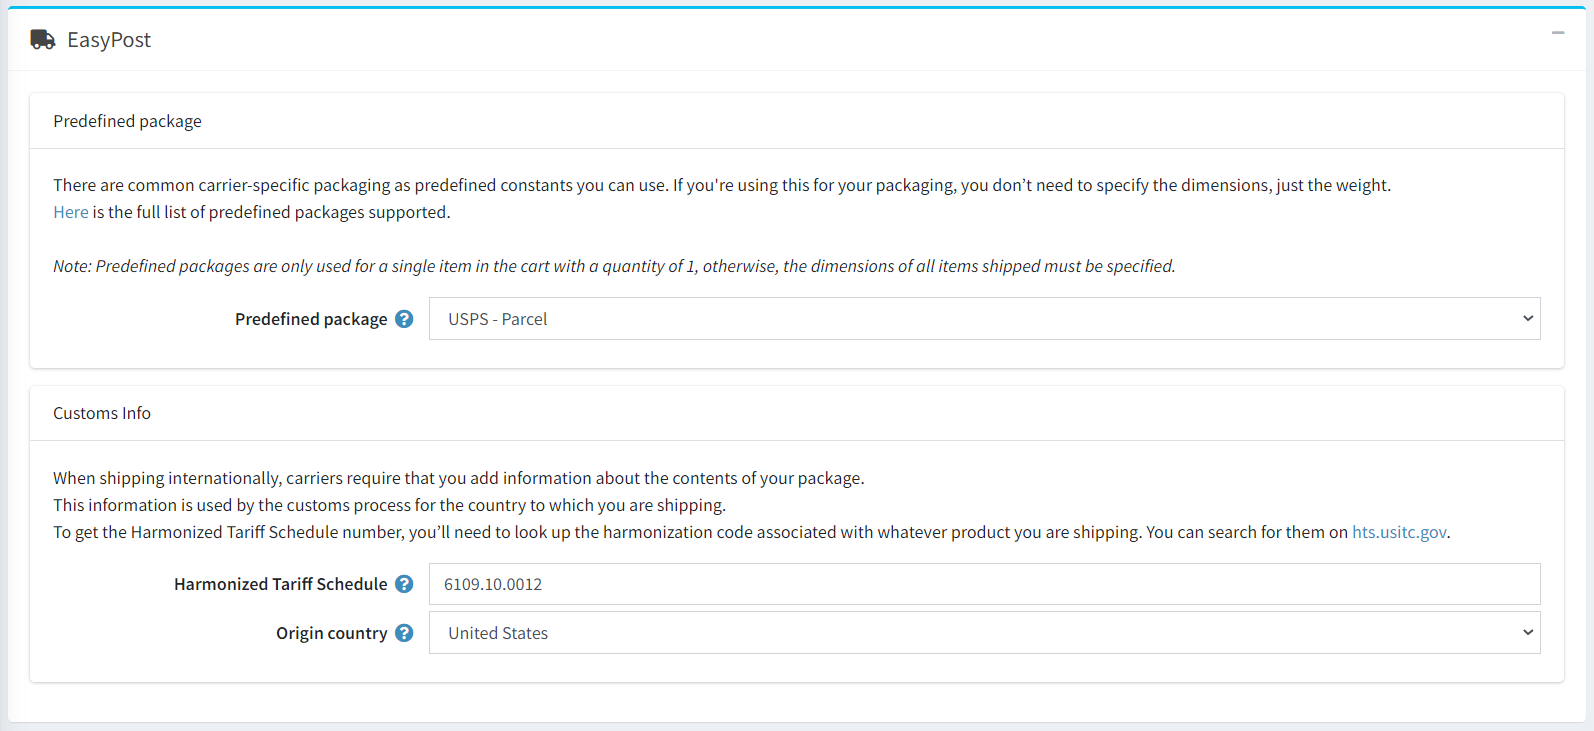
Predefined package
There are common carrier-specific packaging types, which you can use as predefined constants. If you use these for your packaging, you don’t need to specify dimensions, just weight. Here is the comprehensive list of predefined packages supported.
Note
Predefined packages are only used for a single item in the cart with a quantity of 1; otherwise, the dimensions of all items shipped must be specified.
- Predefined package is the name of the predefined package.
Customs Info
When shipping internationally, carriers require that you add information about the contents of your package. This information is used in the customs process for the destination country.
- Harmonized Tariff Schedule is the six-digit code for your product, as specified by the harmonized system for tariffs.
- Origin country is where the product was manufactured or assembled.
Tip
To get the Harmonized Tariff Schedule number, you need to look up the harmonization code associated with the product you are shipping. You can search for them at hts.usitc.gov.
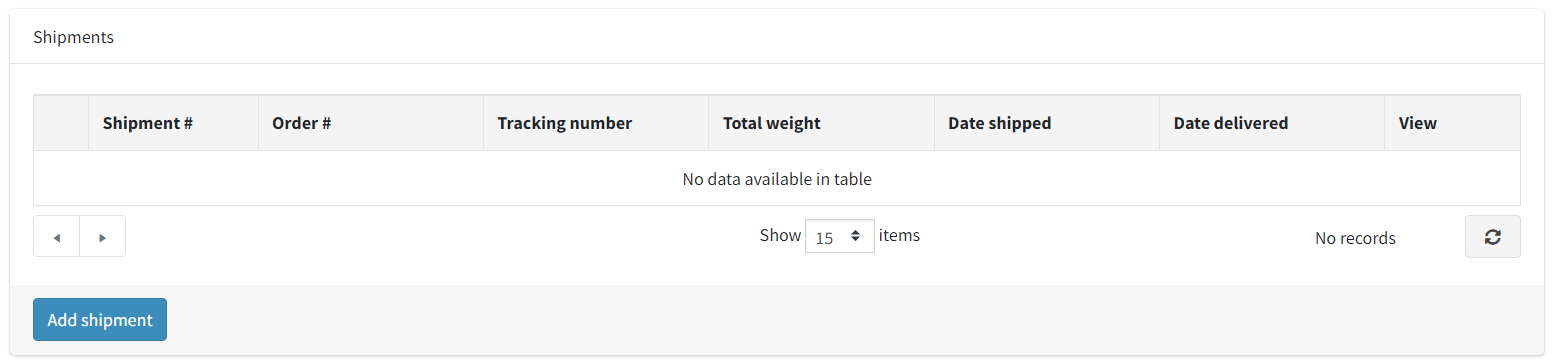
Shipments
This plugin allows you to buy labels for your shipments (when used as a shipping method for an order) and schedule the pickup of parcels to the carrier directly from the admin area of your store.
Go to order details and create a shipment.
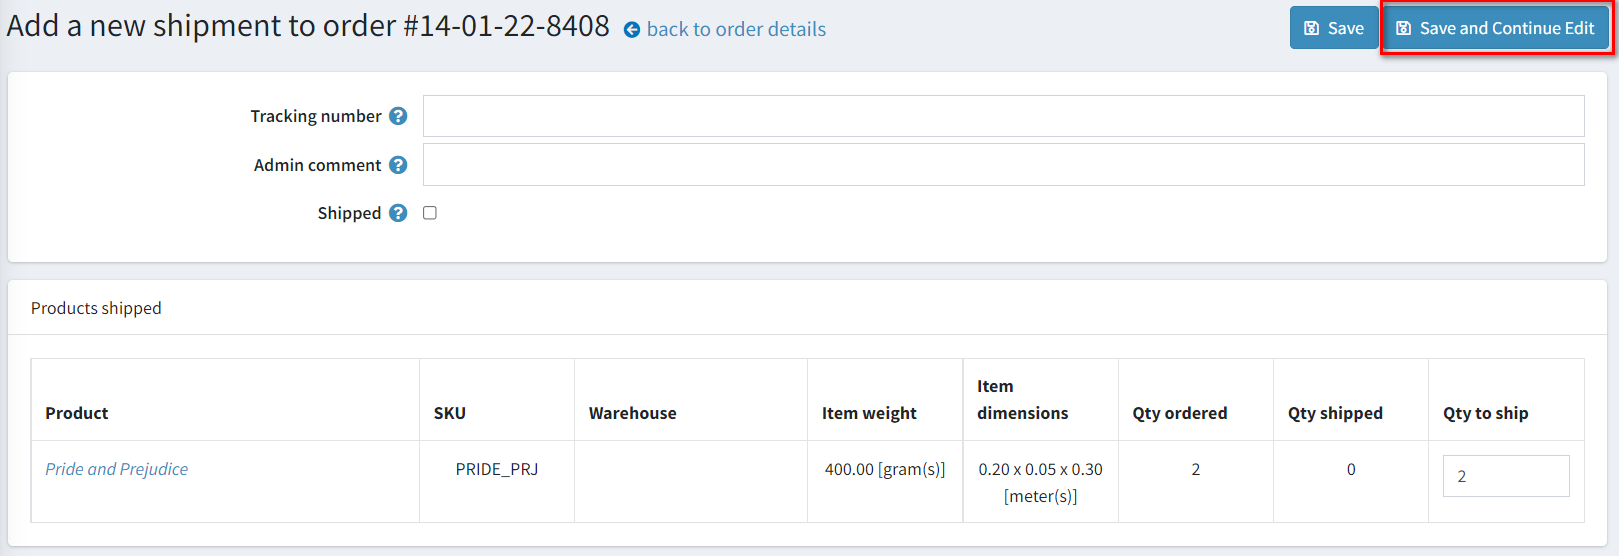
Find the EasyPost section on the shipment details page.
Here, you can set many options for your shipment. See the hints for a detailed description. Then click the Update button.


Note
If you add options or customs form, rates may adjust because, during the checkout, a customer selects shipping rate without considering these parameters.
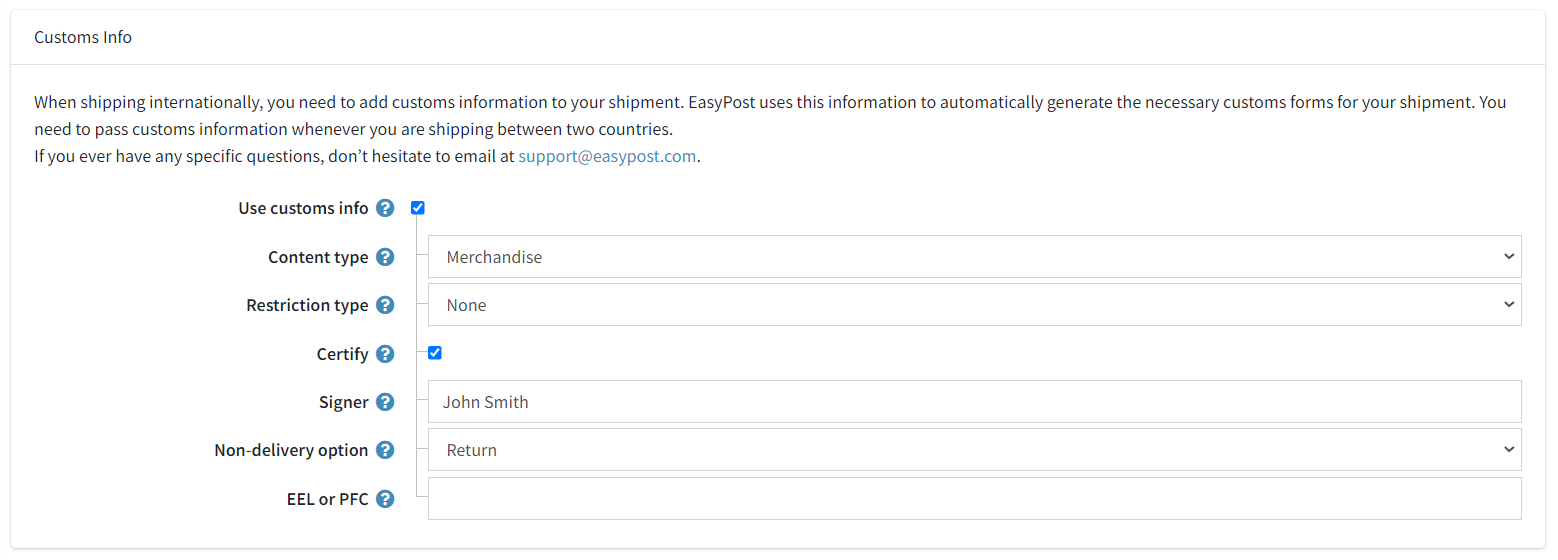
When shipping internationally, you need to add customs information to your shipment. EasyPost uses this information to automatically generate necessary customs' forms for your shipment. You need to pass customs information whenever you are shipping between two countries. Specify customs info and click the Update button.
When all details are set or no shipment update is required, you can buy a label.
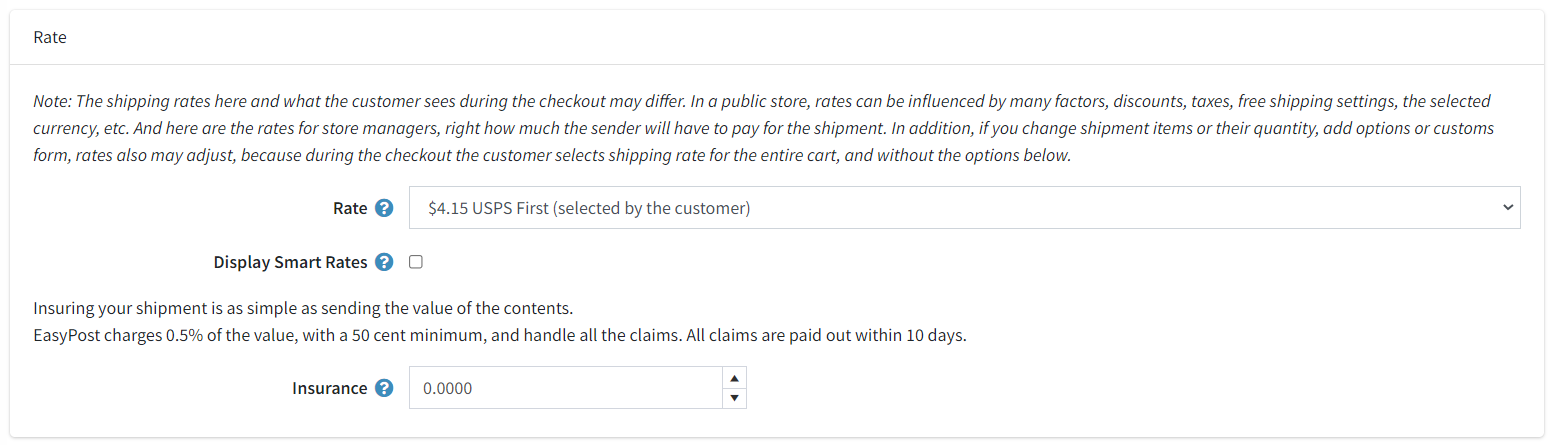
- Rate is the rate to purchase this shipment. The rate selected by the customer during checkout is displayed by default, but you can choose any other available delivery rate.
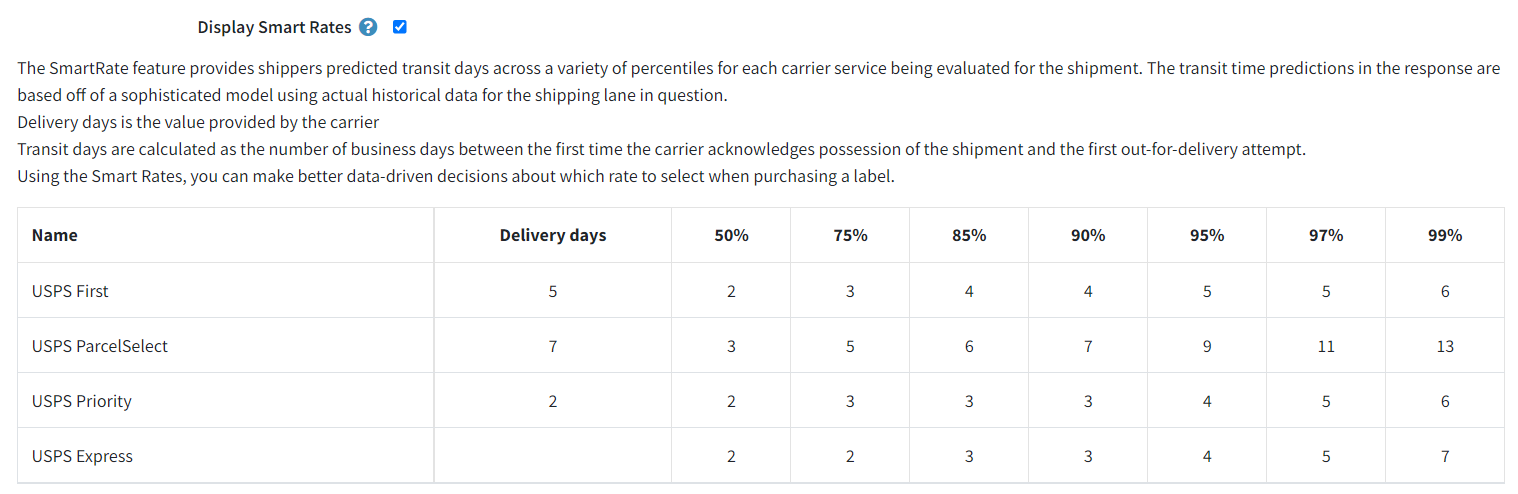
- Display Smart Rates is enabled to display Smart Rates. The SmartRate feature provides shippers with a predicted transit period (in days) across a variety of percentiles for each carrier service evaluated for the shipment. Using the Smart Rates, you can make better data-driven decisions about which rate to select when purchasing a label.
- Insurance is an amount to insure the shipment. EasyPost charges 0.5% of the value, with a 50 cent minimum, and handles all the claims. All claims are paid out within 10 days.
Select a rate (and insurance amount if needed), then click the "Buy label" button.

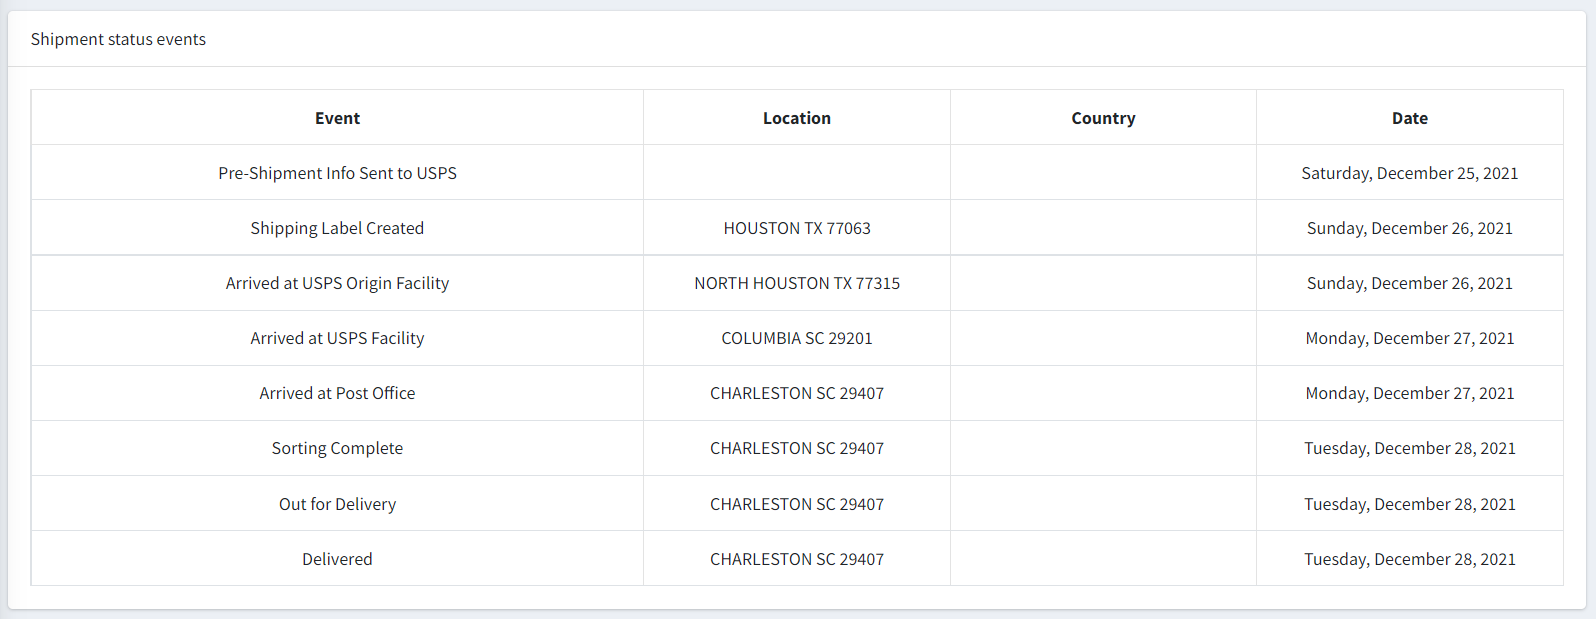
After the purchase, the tracking code is set automatically; you can track shipment events on the EasyPost site or the shipment page below.

Now you can download the label.

Creating a pickup allows you to schedule a pickup from your carrier, customer's residence or place of business. Specify instructions, address, and pickup date. Then click the Create pickup button.
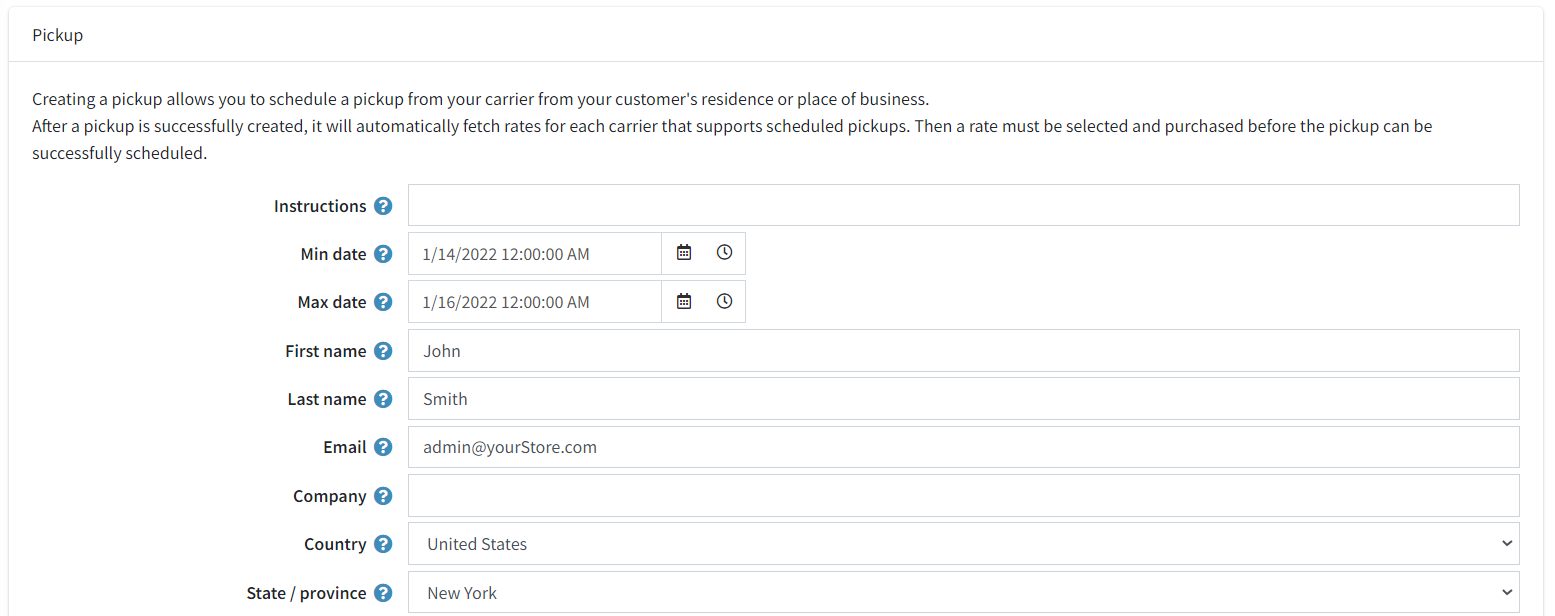

After a pickup is successfully created, it automatically fetches rates for each carrier that supports scheduled pickups. Then, a rate must be selected and purchase made before the pickup can be successfully scheduled.
Batches
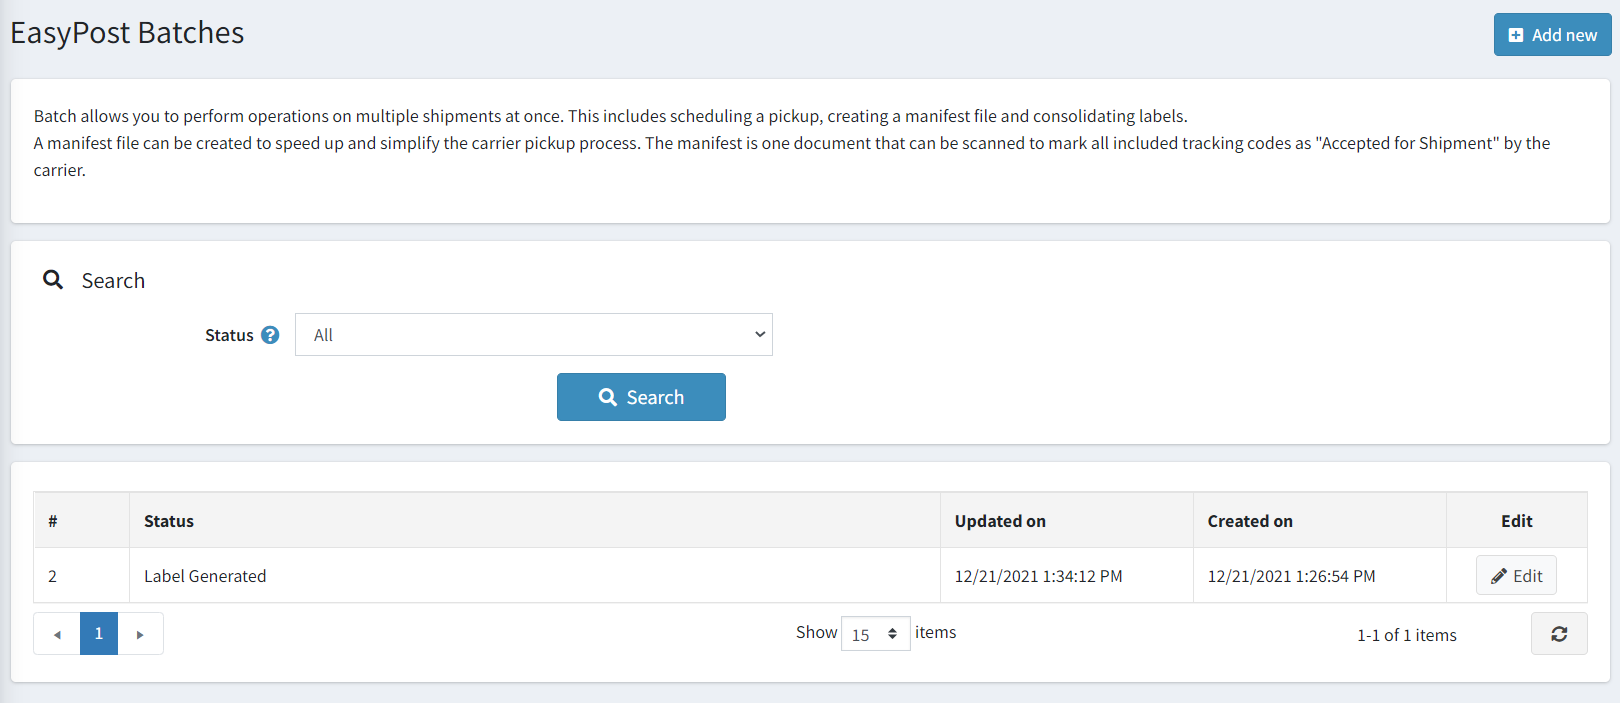
Batch allows you to perform operations on multiple shipments at once. This includes scheduling a pickup, creating a manifest file, and consolidating labels.
Go to Sales → EasyPost Batches.
New batch
Click the Add new button, then add shipments for this batch and save.
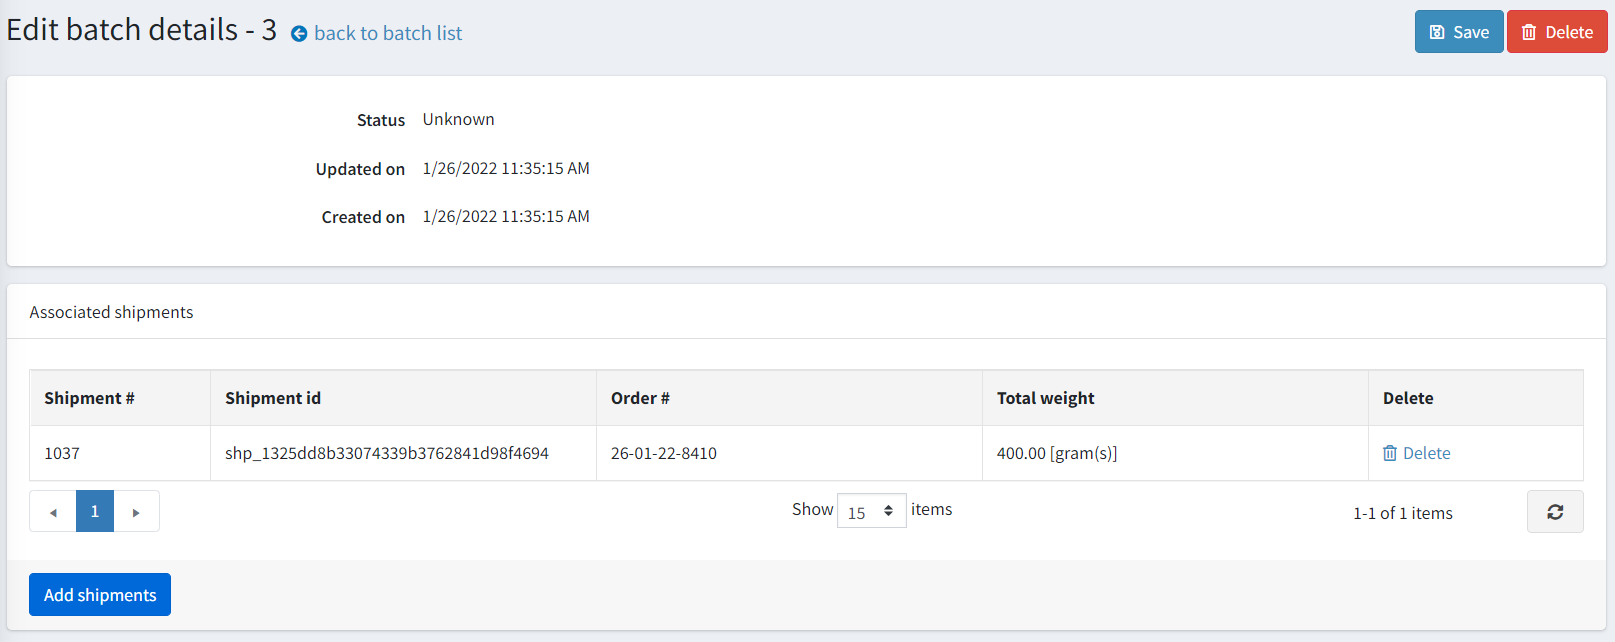
After you create a batch, you can still add shipments to it. Sometimes you might also need to remove a shipment from a batch. You can do that too. For example, a particular shipment may have an invalid address, but you may still want to continue with the rest of the shipments. Change the collection of shipments as you wish, and then save the batch again.
Once all associated shipments have been purchased, you can generate labels. All labels for a batch will be in a single file that you download.

Note
It takes a little time to create all labels. The button for downloading the file will appear automatically when a batch status is Label generated.

Tip
You can also click the Save button to check a batch status if it is not updated automatically.
A manifest file can be created to speed up and simplify a carrier pickup process. A manifest is a document that can be scanned to mark all included tracking codes as "Accepted for Shipment" by a carrier.
