- Updated:


Creating / Writing your theme (using current/default theme)
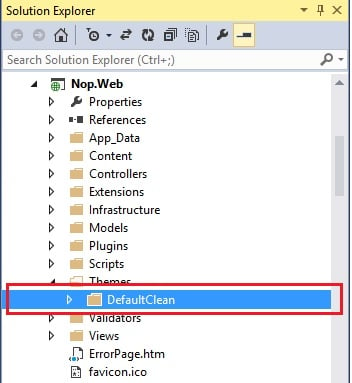
Open your nopCommerce solution or website (web version) in Microsoft Visual Studio - Go to this location:
- If using source code:
\Nop.Web\Themes\ - If using web version:
\[Project Root]\Themes\
Select any default / current theme
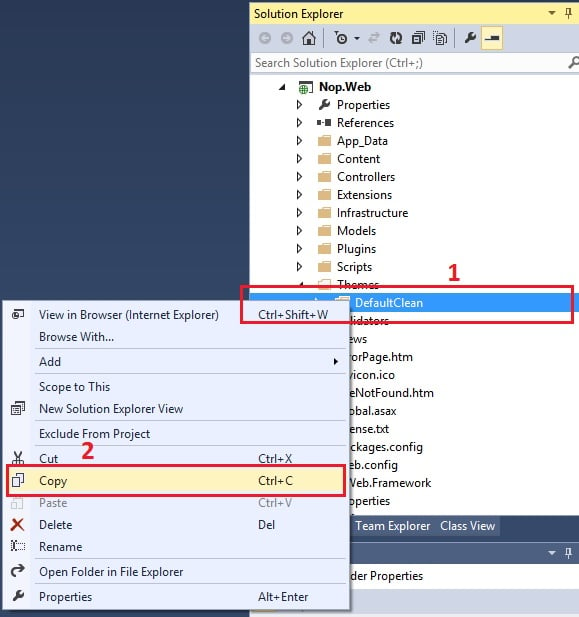
Now, Right-click on the theme → select COPY
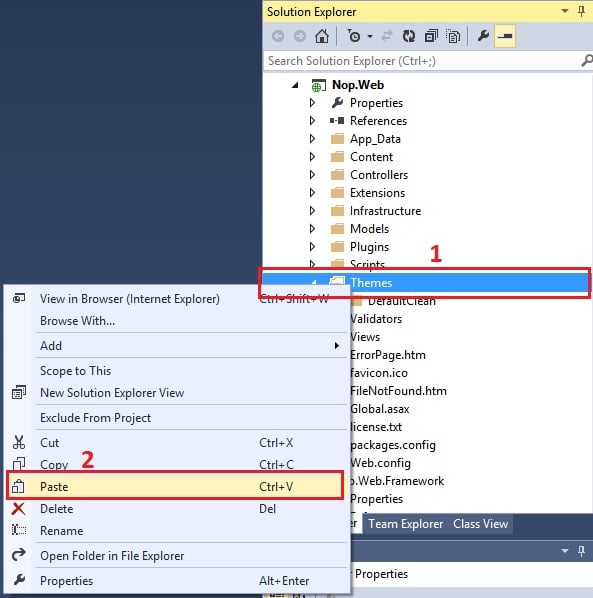
Now select the "Theme" folder → right-click → PASTE
You will get something like "Copy of default/current theme"
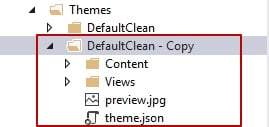
Rename it - whatever you like to be the name of your new theme – For instance, let's say: MyFirstTheme

Now inside your New theme folder "MyFirstTheme" → open
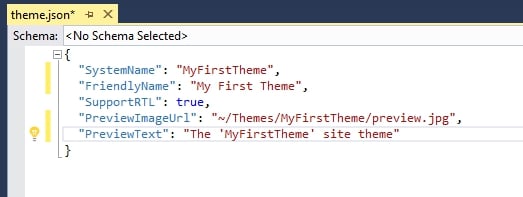
theme.json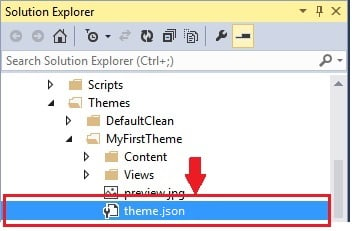
Change the current/existing theme name with your new theme name "MyFirstTheme"
Now, inside your new theme folder "MyFirstTheme" → Content → Images add your new images in the "images" directory and start updating/customizing your
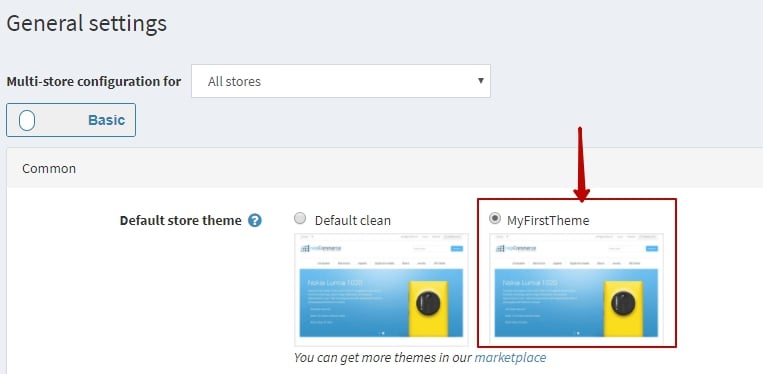
style.cssaccording to your requirements.If you would like to test the changes → Go to the Admin section → Apply your new theme → Save the change and preview your public store.